How to Make Rye Bread Fluffy: The Expert Tips
What To Know
- In this comprehensive guide, we will embark on a step-by-step journey to unravel the secrets of creating the perfect fluffy rye bread.
- Place the dough in a lightly oiled bowl, cover it with plastic wrap, and let it rise in a warm place for 6-12 hours, or until doubled in size.
- Remove the bread from the oven and let it cool on a wire rack for at least 30 minutes before slicing and serving.
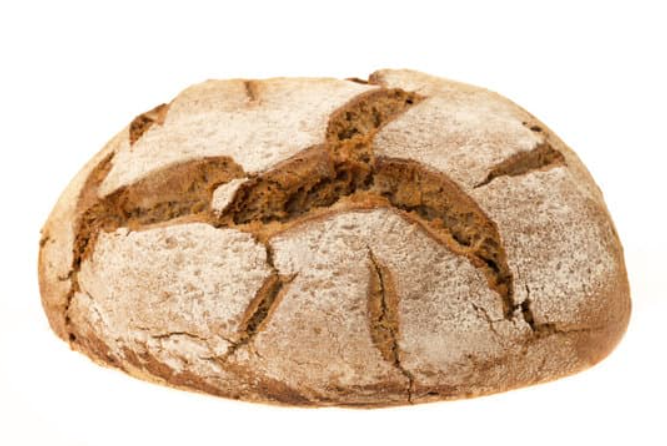
Rye bread, with its distinctive earthy flavor and dense texture, is a staple in many cultures. However, achieving a fluffy, airy loaf can be a challenge. In this comprehensive guide, we will embark on a step-by-step journey to unravel the secrets of creating the perfect fluffy rye bread.
Understanding the Nature of Rye Flour
Rye flour, unlike wheat flour, contains less gluten, which is a protein responsible for elasticity and structure in bread. This lower gluten content contributes to the dense texture of rye bread. To achieve fluffiness, we need to compensate for this lack of gluten.
Choosing the Right Ingredients
Flour: Opt for a combination of rye flour and bread flour or all-purpose flour. The bread flour or all-purpose flour will provide additional gluten to enhance the rise.
Starter or Yeast: Use a sourdough starter or active dry yeast to initiate fermentation and create carbon dioxide, which will cause the bread to rise.
Water: The amount of water used will impact the texture. For fluffier bread, use a higher hydration percentage (up to 75%).
Other Ingredients: Salt, honey, or malt syrup can enhance the flavor and promote a more even rise.
Step-by-Step Instructions
1. Create the Starter or Activate the Yeast
If using a sourdough starter, feed it a few hours before beginning. If using yeast, activate it in warm water with a pinch of sugar.
2. Mix the Ingredients
In a large bowl, combine the rye flour, bread flour (or all-purpose flour), salt, and any other desired ingredients. Gradually add the water while mixing until a sticky dough forms.
3. Autolyse
Allow the dough to rest for 30-60 minutes. This process, known as autolyse, allows the flour to absorb the water and develop gluten.
4. Knead the Dough
Turn the dough out onto a lightly floured surface and knead for 5-10 minutes until it becomes smooth and elastic. If the dough is too sticky, add a little more flour. If it’s too dry, add a little more water.
5. Bulk Fermentation
Place the dough in a lightly oiled bowl, cover it with plastic wrap, and let it rise in a warm place for 6-12 hours, or until doubled in size.
6. Shape and Proof
Punch down the risen dough and shape it into a loaf. Place it on a baking sheet lined with parchment paper. Cover it again and let it proof for 1-2 hours, or until almost doubled in size.
7. Bake
Preheat the oven to 450°F (230°C). Score the top of the loaf and bake for 30-45 minutes, or until the internal temperature reaches 200°F (93°C).
8. Cool and Enjoy
Remove the bread from the oven and let it cool on a wire rack for at least 30 minutes before slicing and serving.
Tips for Extra Fluffiness
- Use a combination of flours: Combining rye flour with bread flour or all-purpose flour provides a better balance of gluten and structure.
- Increase the hydration: A higher hydration percentage (up to 75%) creates a more open crumb.
- Knead thoroughly: Proper kneading develops gluten and improves elasticity.
- Allow for sufficient fermentation: Adequate fermentation allows the dough to rise fully and develop flavor.
- Score the loaf: Scoring the top of the loaf allows steam to escape, resulting in a taller and fluffier bread.
Troubleshooting Common Issues
Dense Bread: Insufficient kneading, inadequate fermentation, or too little water can lead to a dense loaf.
Flat Bread: Over-proofing or too much water can cause the dough to collapse.
Crumbly Bread: Too much flour or not enough kneading can result in a crumbly texture.
Sour Bread: Over-fermentation or an overly active starter can give the bread a sour flavor.
In a nutshell: The Art of Rye Bread Mastery
Achieving fluffy rye bread requires a combination of careful ingredient selection, proper technique, and attention to detail. By following the steps outlined in this guide and experimenting with different tips, you can master the art of creating the perfect, fluffy rye bread that will delight your taste buds.
Questions We Hear a Lot
Q: Can I use whole rye flour for fluffy bread?
A: Using whole rye flour will result in a denser texture. It’s best to combine rye flour with other flours for a lighter loaf.
Q: How can I store rye bread to maintain its fluffiness?
A: Store rye bread in an airtight container at room temperature for up to 3 days. For longer storage, freeze the bread in slices.
Q: Can I use a bread machine to make rye bread?
A: Yes, bread machines can be used to make rye bread. However, it’s important to adjust the settings and ingredients to accommodate the lower gluten content of rye flour.
