Can You Make Brioche in a Bread Maker? The Answer Is Yes!
What To Know
- Place the dough in a lightly oiled bowl, cover with plastic wrap, and let it rise in a warm place for 12-16 hours.
- If the dough is too sticky, add a little more flour, 1 tablespoon at a time, until it becomes manageable.
- Ensure that the yeast is active and the dough is in a warm place for rising.
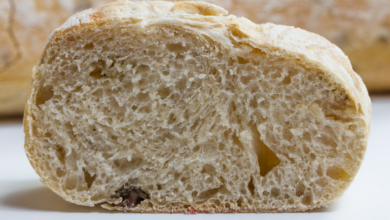
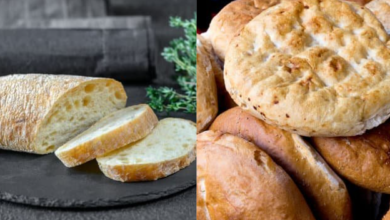
Ciabatta, the iconic Italian bread with its signature large holes and airy texture, has long been associated with traditional baking methods. However, with the advent of modern bread makers, home bakers are now wondering: can you make ciabatta in a bread maker? The answer is a resounding yes! This guide will provide a comprehensive walkthrough of the process, empowering you to create mouthwatering ciabatta loaves in the comfort of your own kitchen.
The Ciabatta Dough: A Unique Blend of Ingredients
The key to achieving the perfect ciabatta dough lies in its unique combination of ingredients. Unlike regular bread dough, ciabatta dough is characterized by:
- High hydration: A ratio of flour to water between 1:3 and 1:4 creates a dough that is soft and pliable.
- Low yeast ratio: A small amount of yeast (usually around 0.5%) allows for a slow, cold fermentation that develops the bread’s distinct flavor and texture.
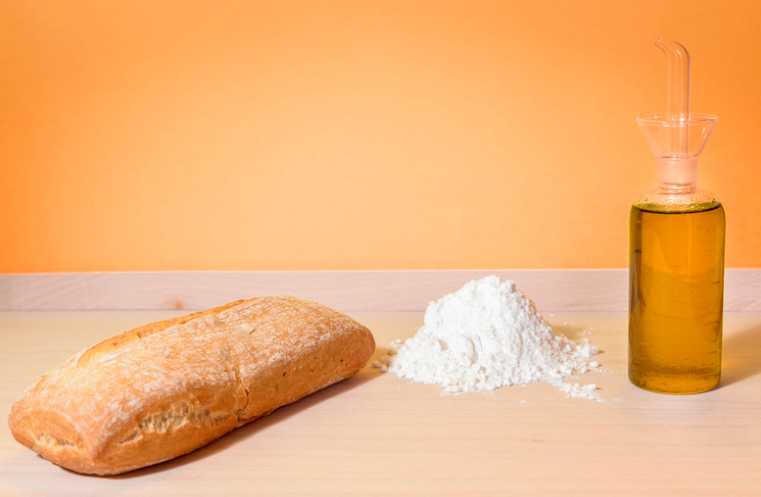
- Additional ingredients: Olive oil, which adds richness, and salt, which enhances flavor, are essential ingredients for authentic ciabatta.
Preparing the Dough: A Step-by-Step Guide
1. Combine dry ingredients: In a large bowl, whisk together the flour and salt.
2. Add water: Gradually add the water while mixing with a wooden spoon or your hands. The dough should be very wet and sticky.
3. Cover and let rest: Cover the bowl with plastic wrap and let the dough rest at room temperature for 30 minutes. This allows the flour to fully absorb the water.
4. Add yeast: Dissolve the yeast in a small amount of warm water. Add the yeast mixture to the dough and mix well.
5. Knead for 5 minutes: Turn the dough out onto a lightly floured surface and knead for 5 minutes. The dough will still be sticky, but it should become smoother and less elastic.
6. Add olive oil: Drizzle a generous amount of olive oil over the dough and knead for another 2 minutes. The dough should now be very soft and pliable.
7. First rise: Place the dough in a lightly oiled bowl, cover with plastic wrap, and let it rise in a warm place for 12-16 hours. The dough should double in size.
Shaping and Baking: Creating the Perfect Loaf
1. Punch down the dough: Once the dough has risen, punch it down to release the air bubbles.
2. Divide and shape: Divide the dough into two equal pieces and shape them into loaves.
3. Second rise: Place the loaves on a baking sheet lined with parchment paper and cover with a damp cloth. Let them rise in a warm place for 1-2 hours, or until they have almost doubled in size.
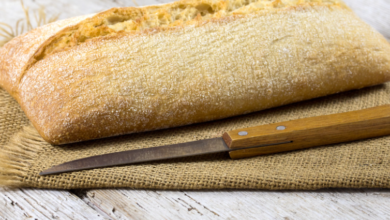
4. Score the loaves: Using a sharp knife, make several deep slashes across the top of the loaves. This will help them expand during baking.
5. Bake: Preheat the oven to 500°F (260°C). Bake the loaves for 20-25 minutes, or until they are golden brown and sound hollow when tapped.
Troubleshooting Tips: Overcoming Common Challenges
1. Sticky dough: If the dough is too sticky, add a little more flour, 1 tablespoon at a time, until it becomes manageable.
2. Loaves not rising: Ensure that the yeast is active and the dough is in a warm place for rising. If the loaves are still not rising, try adding a little more yeast.
3. Dense loaves: If the loaves are dense and lack air holes, the dough may not have been kneaded enough. Knead the dough for a longer period of time to develop the gluten.
4. Burnt loaves: If the loaves are burning, reduce the oven temperature by 25°F (15°C) and bake for a shorter amount of time.
Variations and Enhancements: Exploring Flavorful Options
- Whole wheat ciabatta: Use whole wheat flour instead of all-purpose flour for a more nutritious and flavorful bread.
- Rosemary ciabatta: Add chopped rosemary to the dough for a fragrant and aromatic twist.
- Sun-dried tomato ciabatta: Incorporate sun-dried tomatoes for a burst of savory flavor.
- Olive ciabatta: Add chopped olives to the dough for a briny and salty addition.
FAQs: Addressing Common Questions
1. Can I use a regular bread maker to make ciabatta? Yes, but the dough may need to be adjusted slightly to accommodate the different settings.
2. How long can I store ciabatta? Ciabatta is best consumed within 2-3 days of baking. It can be stored at room temperature or frozen for up to 3 months.
3. What is the best way to reheat ciabatta? To reheat ciabatta, wrap it in aluminum foil and place it in a preheated oven at 350°F (175°C) for 10-15 minutes.
Final Note: Embracing the Art of Ciabatta Baking
Making ciabatta in a bread maker is a rewarding experience that allows home bakers to enjoy the taste and texture of this beloved Italian bread. By following the steps outlined in this guide and experimenting with different variations, you can master the art of creating mouthwatering ciabatta loaves that will impress your family and friends. Whether you are a seasoned baker or a novice, this guide will empower you to unlock the secrets of ciabatta baking and elevate your culinary skills.